Customized CGH
Computer-Generated Holography (CGH) can transform the test wavefront of a laser interferometer into the desired aspheric or freeform wavefront, making it particularly suitable for high-precision aspheric and freeform surface shape testing.
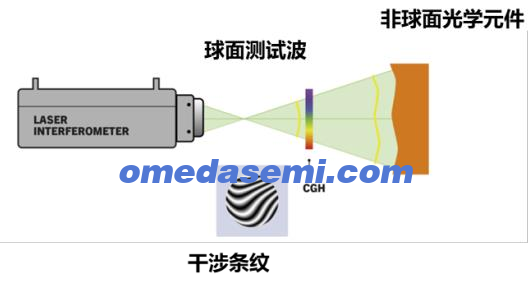
The errors of Computer-Generated Holography (CGH) mainly originate from design errors, substrate transmission wavefront, and grating position errors. In general, the design residual can be optimized to 0.001λ and is negligible. The high-precision substrates adopted by our company typically achieve a transmission wavefront of RMS λ/100 (with customizable substrates up to λ/600 RMS precision). The grating position error is generally about 80 nm*, with the best performance better than 20 nm, using laser or electron-beam direct writing. The overall measurement accuracy is typically better than λ/80, and can reach up to λ/600 RMS* (λ = 632.8 nm, where * indicates that the precision depends on the pattern and equipment).
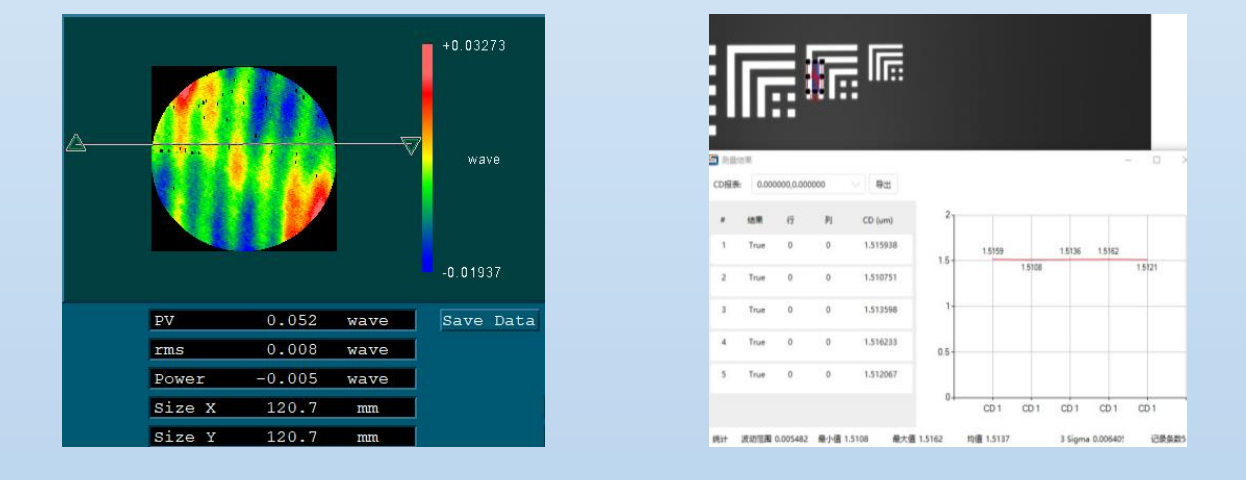
Substrate transmission wavefront: 0.008 λ High-precision linewidth fabrication error better than 10 nm
At present, our company can produce CGHs of different series with diameters ranging from 4 to 12 inches (both amplitude type and phase type, suitable for high and low reflectivity). The minimum linewidth can reach 300 nm.
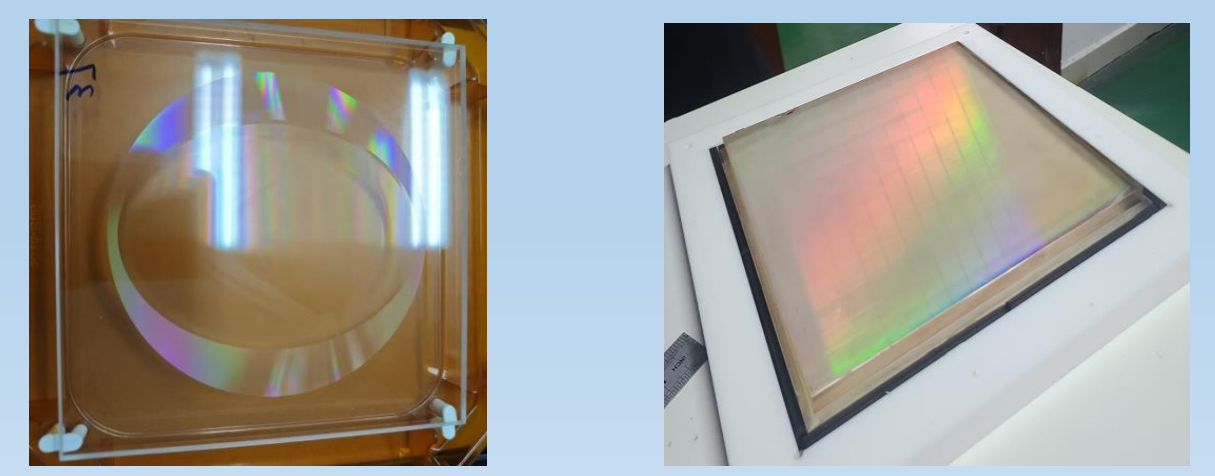
Conventional 6-inch phase-type CGH 12-inch phase-type CGH
Typical product: System alignment CGH
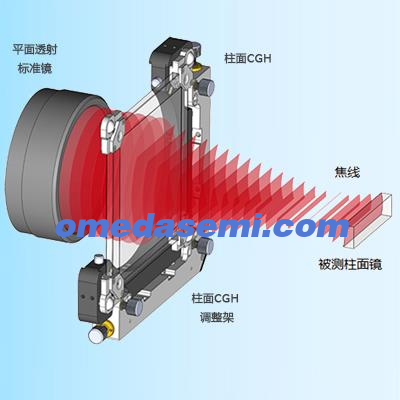
Cylindrical CGH can convert incident parallel beams into cylindrical waves, enabling the measurement of cylindrical mirrors. Our company offers various cylindrical CGH options with different F-numbers, and customized designs are also available.
Special service: For large-aperture convex and concave cylindrical surfaces, combined with our proprietary cylindrical mirror stitching algorithm, measurements of cylindrical apertures larger than 400 mm can be achieved.
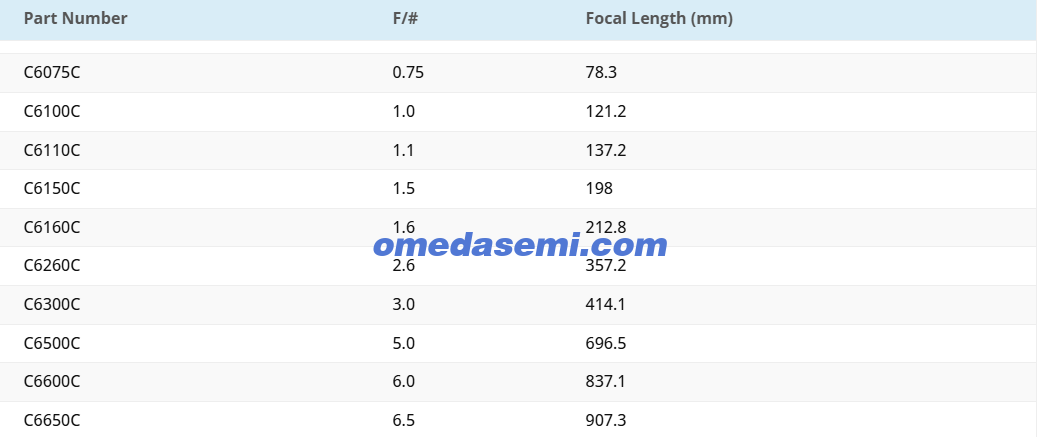

Large-aperture convex cylindrical stitching
Typical products: Aspheric and freeform CGHs
Aspheric and freeform CGHs can convert incident parallel beams or spherical waves into the required ideal wavefronts, in order to meet the precision requirements for testing aspheric and freeform surfaces.

To better align the CGH with the test mirror, corresponding alignment holograms and feature-point holograms are fabricated on the CGH. This facilitates quick installation and alignment between the CGH and the test mirror, significantly reducing adjustment time.
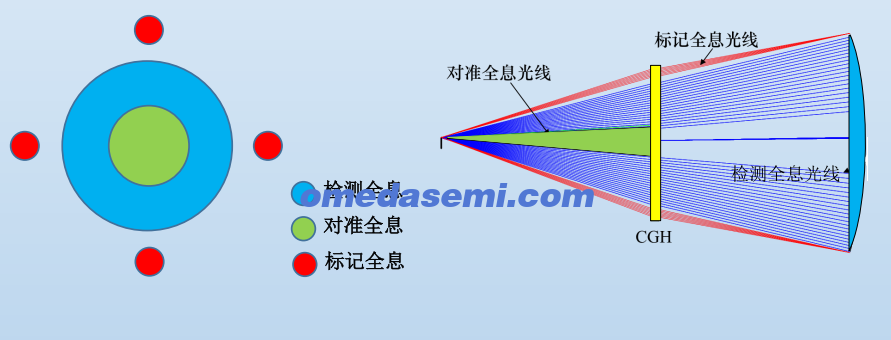
Special Service: Distortion Correction. In optical paths measured with CGH, distortions are inevitably introduced. When the distortion is excessive, it can severely affect the machining accuracy of CNC polishing. Our company provides a complete distortion-correction software package, which enables rapid correction of distortions on the tested surface.
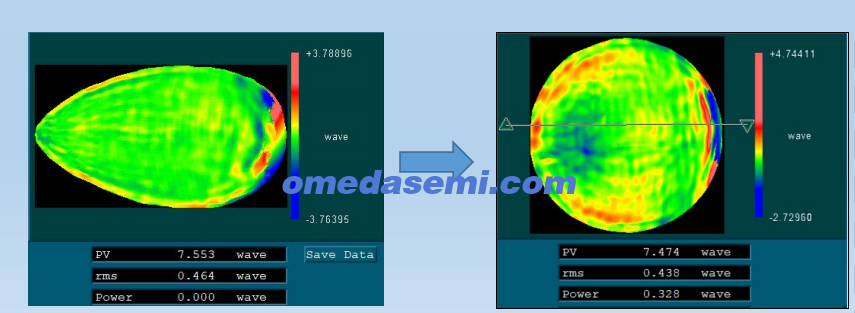
Distortion correction
Typical product: System alignment CGH
Alignment difficulties are a major challenge faced by traditional freeform optical systems. Therefore, a recent development trend is the concept of "multi-surface integration," where multiple complex surfaces in the system are processed on a single optical element at determined relative positions, sharing a common mirror body. CGH can simultaneously create multiple functional regions, achieving high-precision alignment of different optical paths for function testing, making it ideal for synchronous inspection of shape and positional errors in integrated multi-surface systems. Our company offers various CGH measurement solutions for integrated optical elements.
To address the difficulty of using a single CGH to simultaneously measure multiple mirrors in off-axis four-mirror and five-mirror systems, we have innovatively proposed a multi-hologram co-reference assembly solution, achieving co-reference assembly between multiple holograms. This solution has been successfully applied to off-axis four-mirror and five-mirror systems. Our company offers various CGH-based alignment solutions for off-axis and coaxial multi-mirror systems

Testing of integrated optical elements
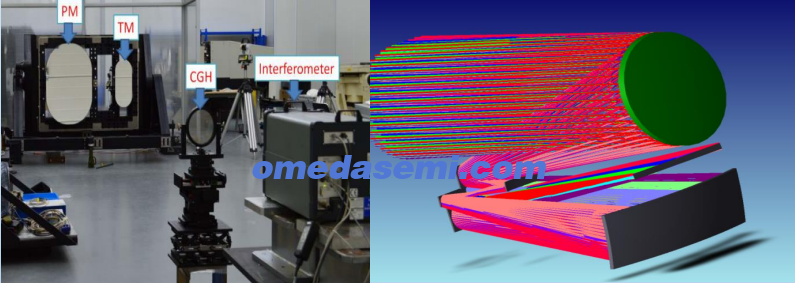
Off-axis three-mirror and five-mirror system alignment
Special Service: Customization of complete solutions for ultra-precision optical testing
Including stitching measurement of planes, cylindrical surfaces, and aspheres; alignment scheme design for off-axis multi-mirror systems; distortion correction of interferometric testing data (paraboloid aplanatic point method, distortion correction for CGH testing/traditional compensator testing); multi-parameter error evaluation of coordinate/contour point cloud data; and undertaking high-difficulty, high-precision optical element testing of various types.
Some application cases
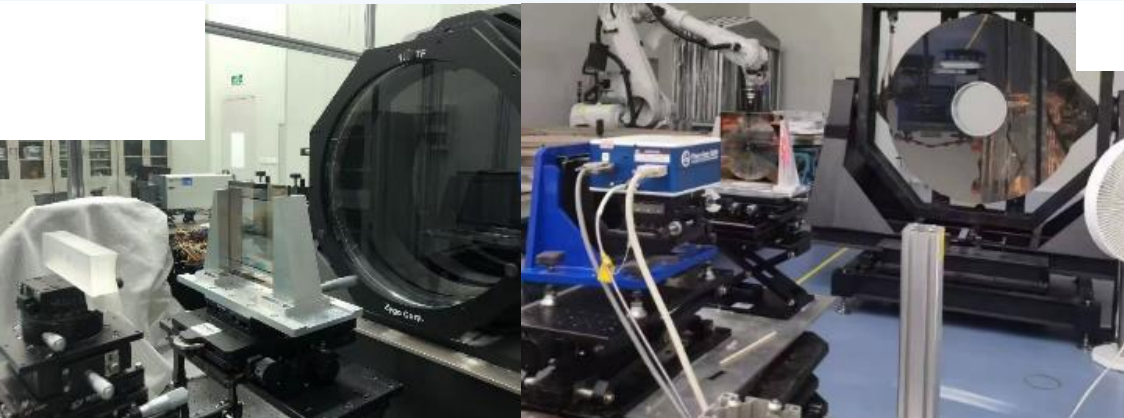
Toroidal CGH measurement CGH measurement of meter-aperture large mirrors
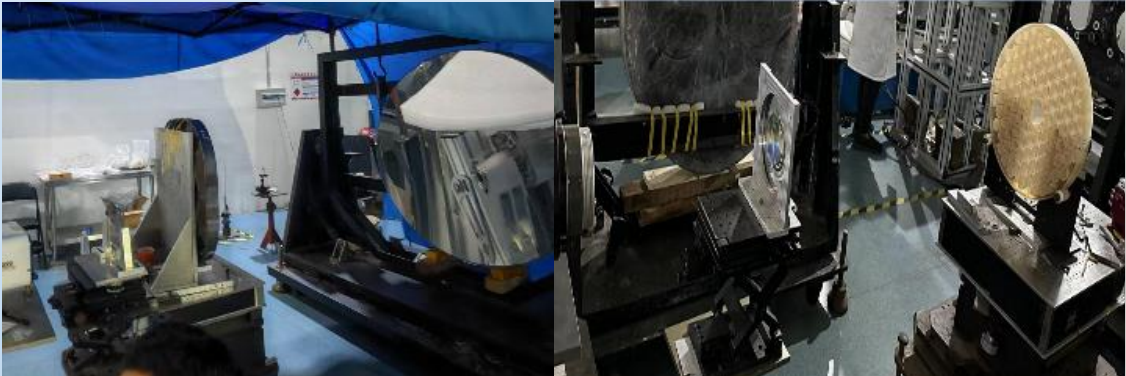
850 mm aperture convex off-axis aspheric CGH measurement CGH measurement of large-aperture high-order aspheric primary mirror
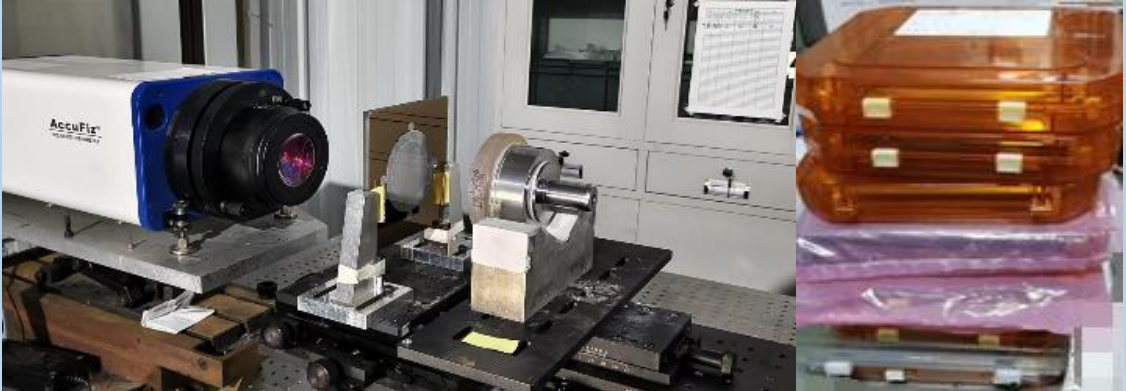
Coaxial high-order aspheric CGH measurement Partial finished products
☆☆☆ Have served multiple domestic research institutes, leading optical component manufacturers, and prestigious universities ☆☆☆
OMeda (Shanghai Omedasemi Co.,Ltd) was founded in 2021 by 3 doctors with more than 10 years of experience in nanpfabrication. It currently has 15 employees and has rich experience in nanofabrication (coating, lithography, etching, two-photon printing, bonding) and other processes. We support nanofabrication of 4/6/8-inch wafers.